What Is the Arduino Platform?
The Arduino platform is an open-source electronics prototyping ecosystem that combines hardware and software to make digital projects easier to build. It’s ideal for beginners and professionals alike, enabling users to create interactive objects that sense and control the physical world. At the heart of the platform are programmable microcontroller boards and the user-friendly Arduino IDE for writing and uploading code.
Whether you’re working with an Arduino Uno, Arduino Nano, or Arduino Mega, the platform supports a wide range of applications and project types.

Table of Contents
- What Is the Arduino Platform?
- Understanding the Arduino Platform and Its Core Components
- Choosing the Right Arduino Board for Your Project
- Using the Arduino IDE and Development Environment
- Getting Started with Arduino Programming
- Tips for the Arduino Platform
- Did You Know About the Arduino Platform?
- Frequently Asked Questions About Arduino Platform
- Arduino Platform Conclusion
Understanding the Arduino Platform and Its Core Components
The Arduino platform consists of several core elements:
- Arduino boards: These include models like the Arduino Uno, Nano, and Mega.
- Arduino IDE: A cross-platform development environment used to write, compile, and upload code to the board.
- Arduino programming: Based on simplified C/C++, making it accessible to beginners.
- Libraries and examples: Ready-to-use code that simplifies working with sensors, displays, motors, and more.
The platform is widely used in educational settings, hobby electronics, and product prototyping due to its versatility and simplicity.
Arduino Platform Boards
There are so many different Arduino microcontroller boards available that it can be confusing for beginners. Available Arduino platform boards are found under the Products menu on the official Arduino website. See the Choosing the Right Arduino Board for Your Project section further down this page for help choosing the right Arduino platform board for your needs.

Beginners usually start with an Arduino Uno board. This board is now available in an R3 (revision 3) and R4 (revision 4) version. The older Arduino Uno R3 has a socket in the board that holds the main microcontroller chip. If the microcontroller is damaged, it can be removed from the socket and a new one plugged in.
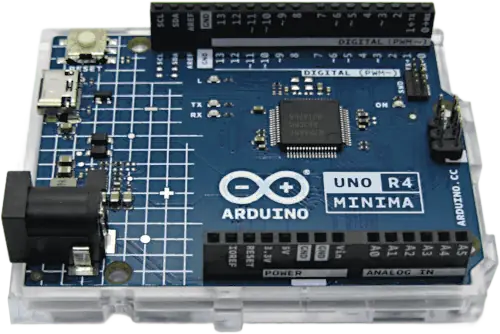
New Arduino R4 boards have a completely different microcontroller than the R3 boards. This new microcontroller can’t easily be removed, as it is soldered to the board. The advantage of the R4 board is that the microcontroller has many more resources than the microcontroller on the R3 board. It is faster and has more memory.
Because the Arduino platform is open-source, many clone and compatible boards are made by various manufacturers. This is because these manufacturers have access to the original files that are used to make official Arduino boards. As a result there are official Arduino boards from Arduino themselves, as well as clone and compatible boards from many other manufacturers.

Arduino IDE for Programming / Coding
The Arduino IDE software is the official programming environment for writing programs that run on an Arduino board. An Arduino program is called a ‘sketch’ in Arduino terminology. The Arduino programming language is based on the C and C++ programming languages. The following image shows the Arduino IDE (Integrated Development Environment) application main window with the code of a sketch loaded.

Arduino Platform Resources
Many different Arduino projects are available at the Arduino project hub. Use this resource to find projects and instructions on how to build projects by a community of Arduino users.
Ask questions and look for answers to questions at the Arduino forum.
Purchase a printed copy of the Ultimate Arduino Uno Hardware Manual at Elektor.
Get a PDF e-book copy of the Ultimate Arduino Uno Hardware Manual E-book at Elektor
Purchase a PDF e-book copy of the Ultimate Arduino MEGA 2560 Hardware Manual.
What can the Arduino Platform be Used For?
The Arduino platform is incredibly versatile and can be used for a wide range of electronics projects and applications—from beginner experiments to advanced systems. Because it combines easy-to-use hardware with beginner-friendly software, it has become one of the most popular platforms for learning and prototyping with microcontrollers.
The following image shows the simplest Arduino circuit. It is an LED (a type of diode) and resistor connected in series to pin 2 of the Arduino. A software sketch can be written to blink the LED on and off as part of learning how the Arduino platform works. This is the simplest Arduino breadboard circuit that can be built.

Common uses for Arduino include:
- Learning Electronics and Programming: Arduino is widely used in schools, universities, and maker communities to teach the basics of digital electronics, sensors, actuators, and embedded programming.
- Home Automation Projects: Control lights, appliances, or build your own smart home devices such as thermostats or motion detectors.
- Robotics: Many simple robots use Arduino boards for motor control, obstacle detection, and sensor integration.
- Environmental Monitoring: Use Arduino to collect data from temperature, humidity, or air quality sensors for DIY weather stations or environmental studies.
- Wearables: Miniature Arduino boards like the Arduino Nano or LilyPad are often used in electronic clothing and wearable tech.
- Art and Interactive Installations: Artists and designers use Arduino to add lights, movement, and interactivity to their work.
- Prototyping Commercial Products: Engineers and product developers often build functional prototypes using Arduino before moving to custom hardware.
With thousands of example projects, a strong community, and support for various sensors and modules, Arduino is an excellent platform for anyone interested in electronics and embedded systems. Whether you’re just starting or creating something more complex, the possibilities with Arduino are nearly endless.
Arduino Add-on Boards
Arduino boards like the Arduino Uno can be extended using add-on boards called shields. A shield is a circuit board that plugs directly into the top of an Arduino board and adds extra functionality without needing complex wiring.
Shields are designed to stack neatly on top of the Arduino and connect to its pins. This makes it easy for beginners to add new features without needing to understand every detail of electronics.

Common examples of shields include:
- Motor shields – to control motors and build simple robots.
- Wi-Fi or Ethernet shields – to connect your project to the internet.
- LCD shields – to display information like text or sensor readings.
- Sensor shields – to make it easier to connect multiple sensors.
Some shields are made specifically for the Arduino Uno, while others are compatible with different models. Always check the shield’s specifications to make sure it works with your Arduino board.
Shields are a great way to expand what your Arduino can do, especially when you’re just starting and want to build more complex projects without soldering or designing custom circuits.
Choosing the Right Arduino Board for Your Project
Different Arduino boards are optimized for different applications. Here’s a comparison of some of the most popular Arduino boards:
| Feature | Arduino Uno R3 | Arduino Uno R4 Minima | Arduino Nano | Arduino Mega 2560 |
|---|---|---|---|---|
| Microcontroller | ATmega328P | Renesas RA4M1 (Arm Cortex-M4) | ATmega328P | ATmega2560 |
| Architecture | 8-bit AVR | 32-bit Arm Cortex-M4 | 8-bit AVR | 8-bit AVR |
| Clock Speed | 16 MHz | 48 MHz | 16 MHz | 16 MHz |
| Flash Memory | 32 KB | 256 KB | 32 KB | 256 KB |
| SRAM | 2 KB | 32 KB | 2 KB | 8 KB |
| EEPROM | 1 KB | 8 KB (emulated) | 1 KB | 4 KB |
| Digital I/O Pins | 14 | 14 | 14 | 54 |
| PWM Pins | 6 | 6 | 6 | 15 |
| Analog Input Pins | 6 | 6 | 8 | 16 |
| Operating Voltage | 5V | 5V | 5V | 5V |
| Input Voltage (recommended) | 7–12V | 6–24V | 7–12V | 7–12V |
| USB Interface | USB-B | USB-C | Mini-USB | USB-B |
| Communication Interfaces | UART, I2C, SPI | UART, I2C, SPI, CAN | UART, I2C, SPI | 4x UART, I2C, SPI |
| Special Features | Widely supported | 32-bit CPU, CAN bus, USB-C | Compact size | High I/O count |

Key Considerations
- Choose Arduino Uno for most beginner projects.
- Use Arduino Nano for compact or space-constrained applications.
- Select Arduino Mega for complex projects requiring many input/output connections.
Using the Arduino IDE and Development Environment
The Arduino IDE is a lightweight, easy-to-use interface where you write and upload code to your Arduino board. It’s officially supported across Windows, macOS, and Linux.
Features of the Arduino IDE
- Syntax highlighting and code formatting
- Integrated compiler and uploader
- Access to built-in and third-party libraries
- Examples for various Arduino projects
For advanced users, the Arduino development IDE also supports custom board definitions and external libraries.
Getting Started with Arduino Programming
Arduino programming is written in a simplified version of C++, making it beginner-friendly. Each sketch (program) consists of two main functions:
void setup() {
  // runs once at the start
}

void loop() {
  // runs continuously
}
Key programming concepts:
- digitalWrite(pin, value): Turn microcontroller / Arduino pins on or off.
- analogRead(pin): Read sensor values from analog pins.
- delay(ms): Pause execution for a set time.
Over time, you’ll use functions, loops, and conditional logic to control devices like LEDs, motors, and sensors. The code below is a simple ‘blink’ sketch that blinks or flashes the Arduino on-board LED that is built into many different Arduino boards. It uses the digitalWrite() and delay() functions mentioned above.
// the setup function runs once when you press reset or power the board
void setup() {
  // initialize digital pin LED_BUILTIN as an output.
  pinMode(LED_BUILTIN, OUTPUT);
}

// the loop function runs over and over again forever
void loop() {
  digitalWrite(LED_BUILTIN, HIGH);   // turn the LED on (HIGH is the voltage level)
  delay(1000);                       // wait for a second
  digitalWrite(LED_BUILTIN, LOW);    // turn the LED off by making the voltage LOW
  delay(1000);                       // wait for a second
}Tips for the Arduino Platform
Here are practical tips to help you get started with the Arduino platform:
- Start with the Arduino Uno: It’s the most documented and beginner-friendly board.
- Use built-in examples: The Arduino IDE includes examples for basic functions.
- Label your wiring: Helps avoid mistakes in complex circuits.
- Keep code modular: Break your logic into functions for clarity.
- Double-check COM port: Ensure you’re uploading to the correct board.
Did You Know About the Arduino Platform?
- The Arduino platform began in 2005 as a student project in Italy.
- “Arduino” was named after a bar in Ivrea, Italy, where the founders met.
- Originally designed for interaction design students, it’s now used worldwide in schools, startups, and research labs.
- The platform has inspired hundreds of compatible boards and open-source clones.
Frequently Asked Questions About Arduino Platform
What is the difference between Arduino Uno and Arduino Nano?
The Arduino Uno and Arduino Nano use the same microcontroller (ATmega328P for the R3 and earlier revisions of these boards) but differ in form factor. The Nano is smaller and uses a mini-USB port, making it ideal for compact designs.
Can I use the Arduino IDE on any operating system?
Yes. The Arduino IDE supports Windows, macOS, and Linux. It also offers a web-based version called the Arduino Web Editor.
Which Arduino board is best for beginners?
The Arduino Uno is generally the best choice for beginners due to its straightforward layout, wide support, and compatibility with most tutorials and shields.
Is Arduino programming difficult to learn?
No. Arduino programming is designed to be accessible. If you’re familiar with basic logic or C-style syntax, you’ll pick it up quickly using examples and community resources.
What can I build with the Arduino platform?
Popular projects include LED blinkers, temperature sensors, home automation systems, robot cars, and weather stations. The only limit is your creativity.
Arduino Platform Conclusion
The Arduino platform is a powerful and accessible tool for anyone interested in electronics and embedded systems. From choosing the right Arduino board to writing your first lines of code in the Arduino IDE, the platform supports a smooth learning curve. Whether you’re using an Arduino Uno, Nano, or Mega, you can confidently build real-world Arduino projects through structured and hands-on learning. Embracing Arduino programming unlocks endless creative and educational opportunities.